
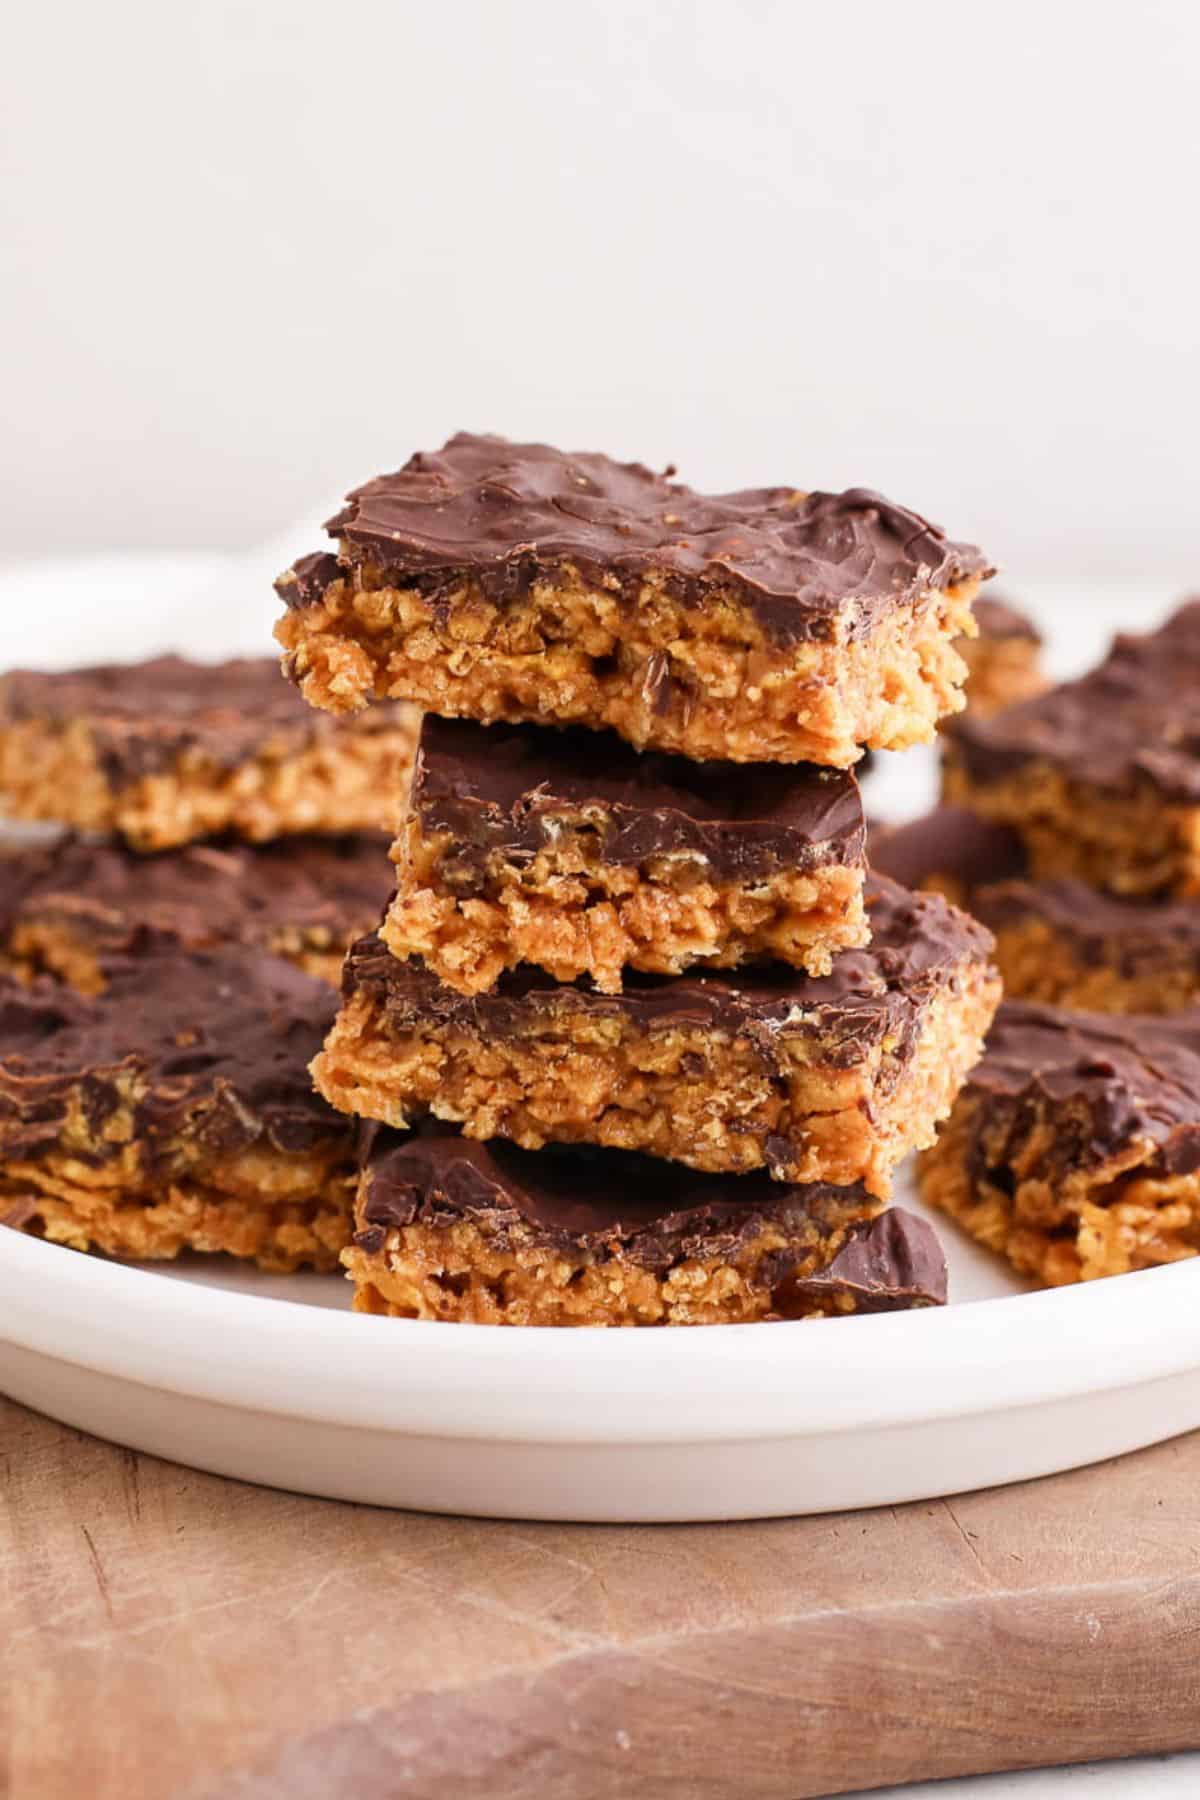
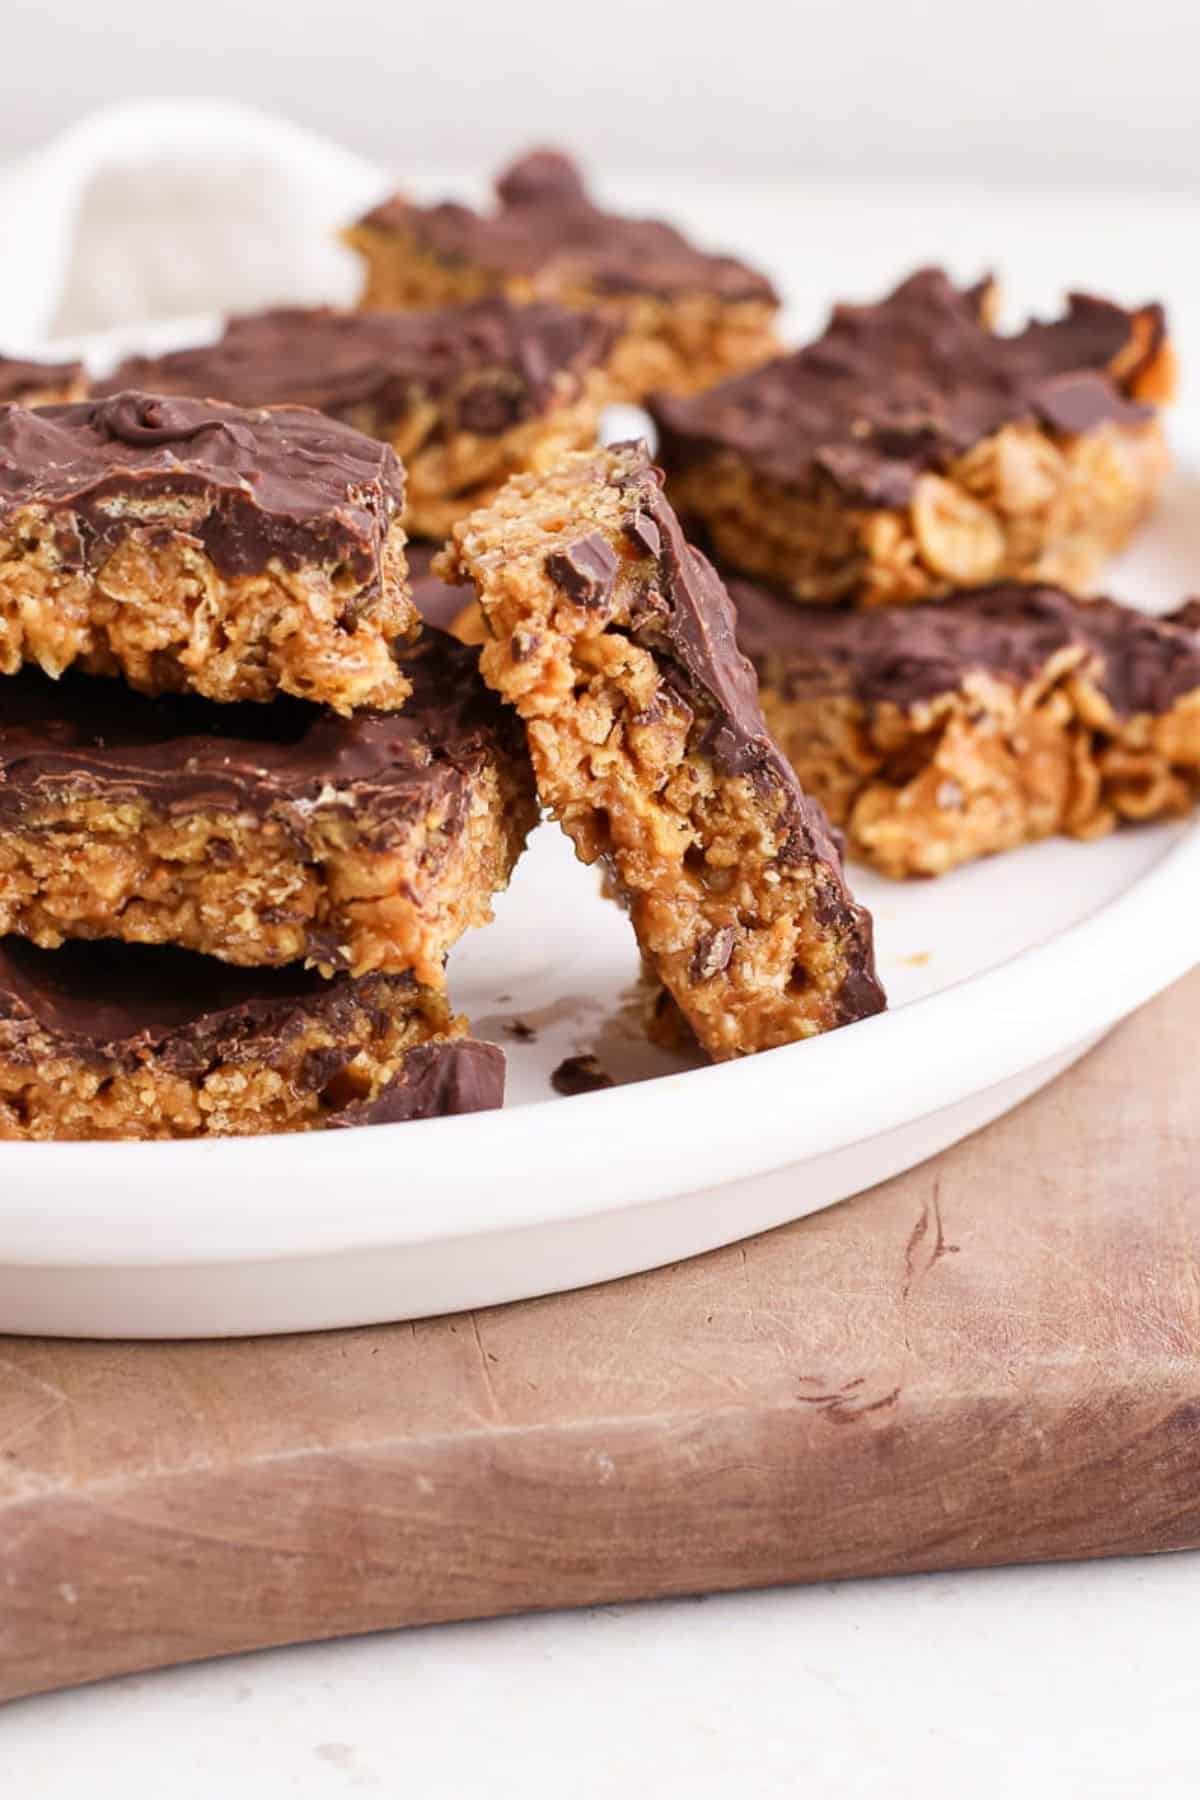
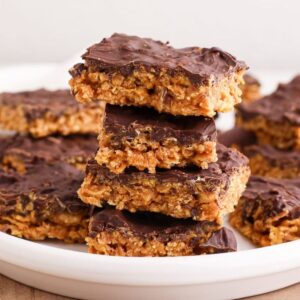
Homemade Butterfinger Bars
Butterfinger bars are crunchy, naturally sweetened, and made with a handful of simple ingredients you likely already have on hand. This homemade version of your favorite childhood candy bar is absolutely addicting. Dairy free, gluten free, and can easily be made nut free.
Looking for more homemade sweet treats? Try my orange creamsicle frozen yogurt bars, chewy lemon blondies, or chocolate dipped oranges.
Ingredient Notes
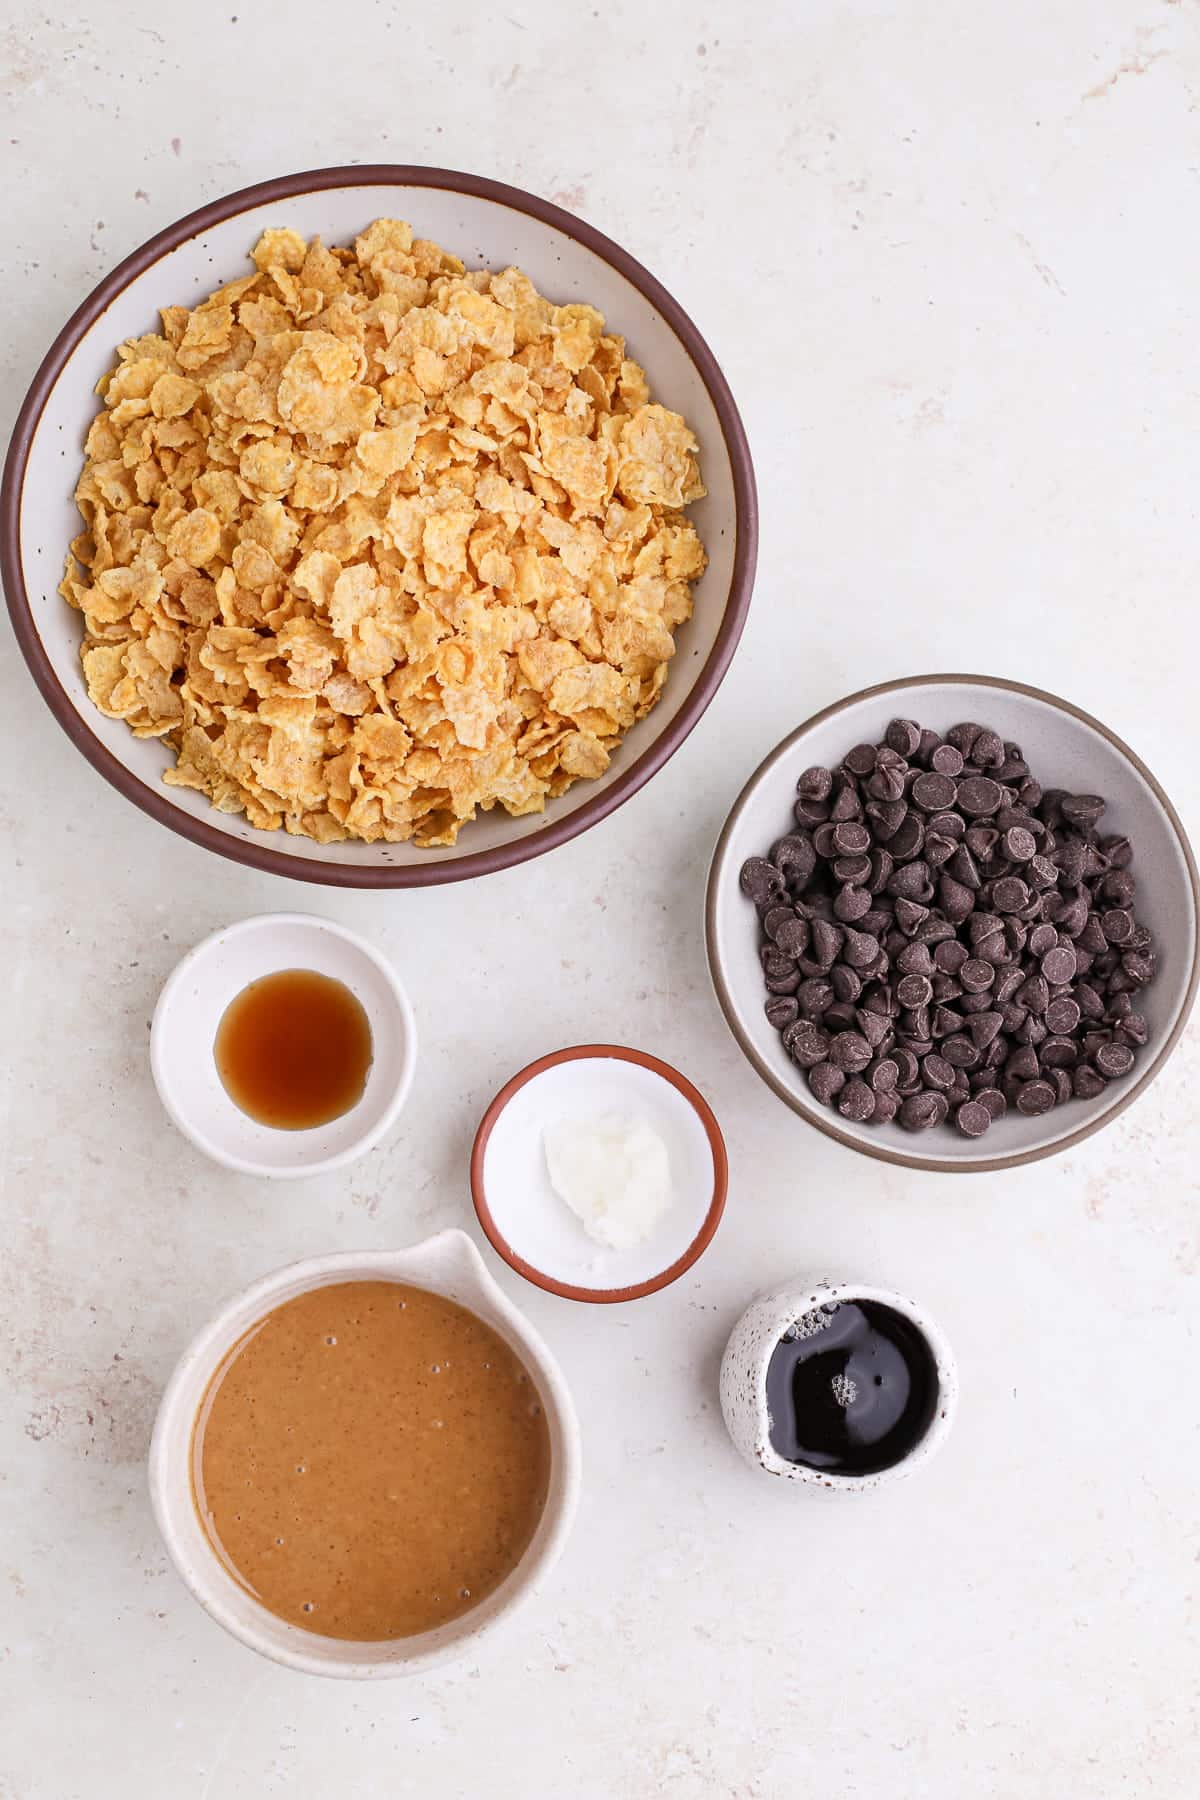
- Creamy peanut butter
- Maple syrup
- Vanilla extract
- Corn flakes – I used 365 organic corn flakes.
- Chocolate chips – I used Enjoy Life ricemilk morsels so they have that similar milk chocolate flavor to original butterfingers.
- Refined coconut oil – a small amount in the chocolate helps achieve a glossier finish and also helps the chocolate harden in the fridge. Refined coconut oil is ideal so it doesn’t give off any coconut flavor.
How to Make: Step By Step
Here are some quick visual instructions. The full instructions and ingredient list will be in the printable recipe card below!
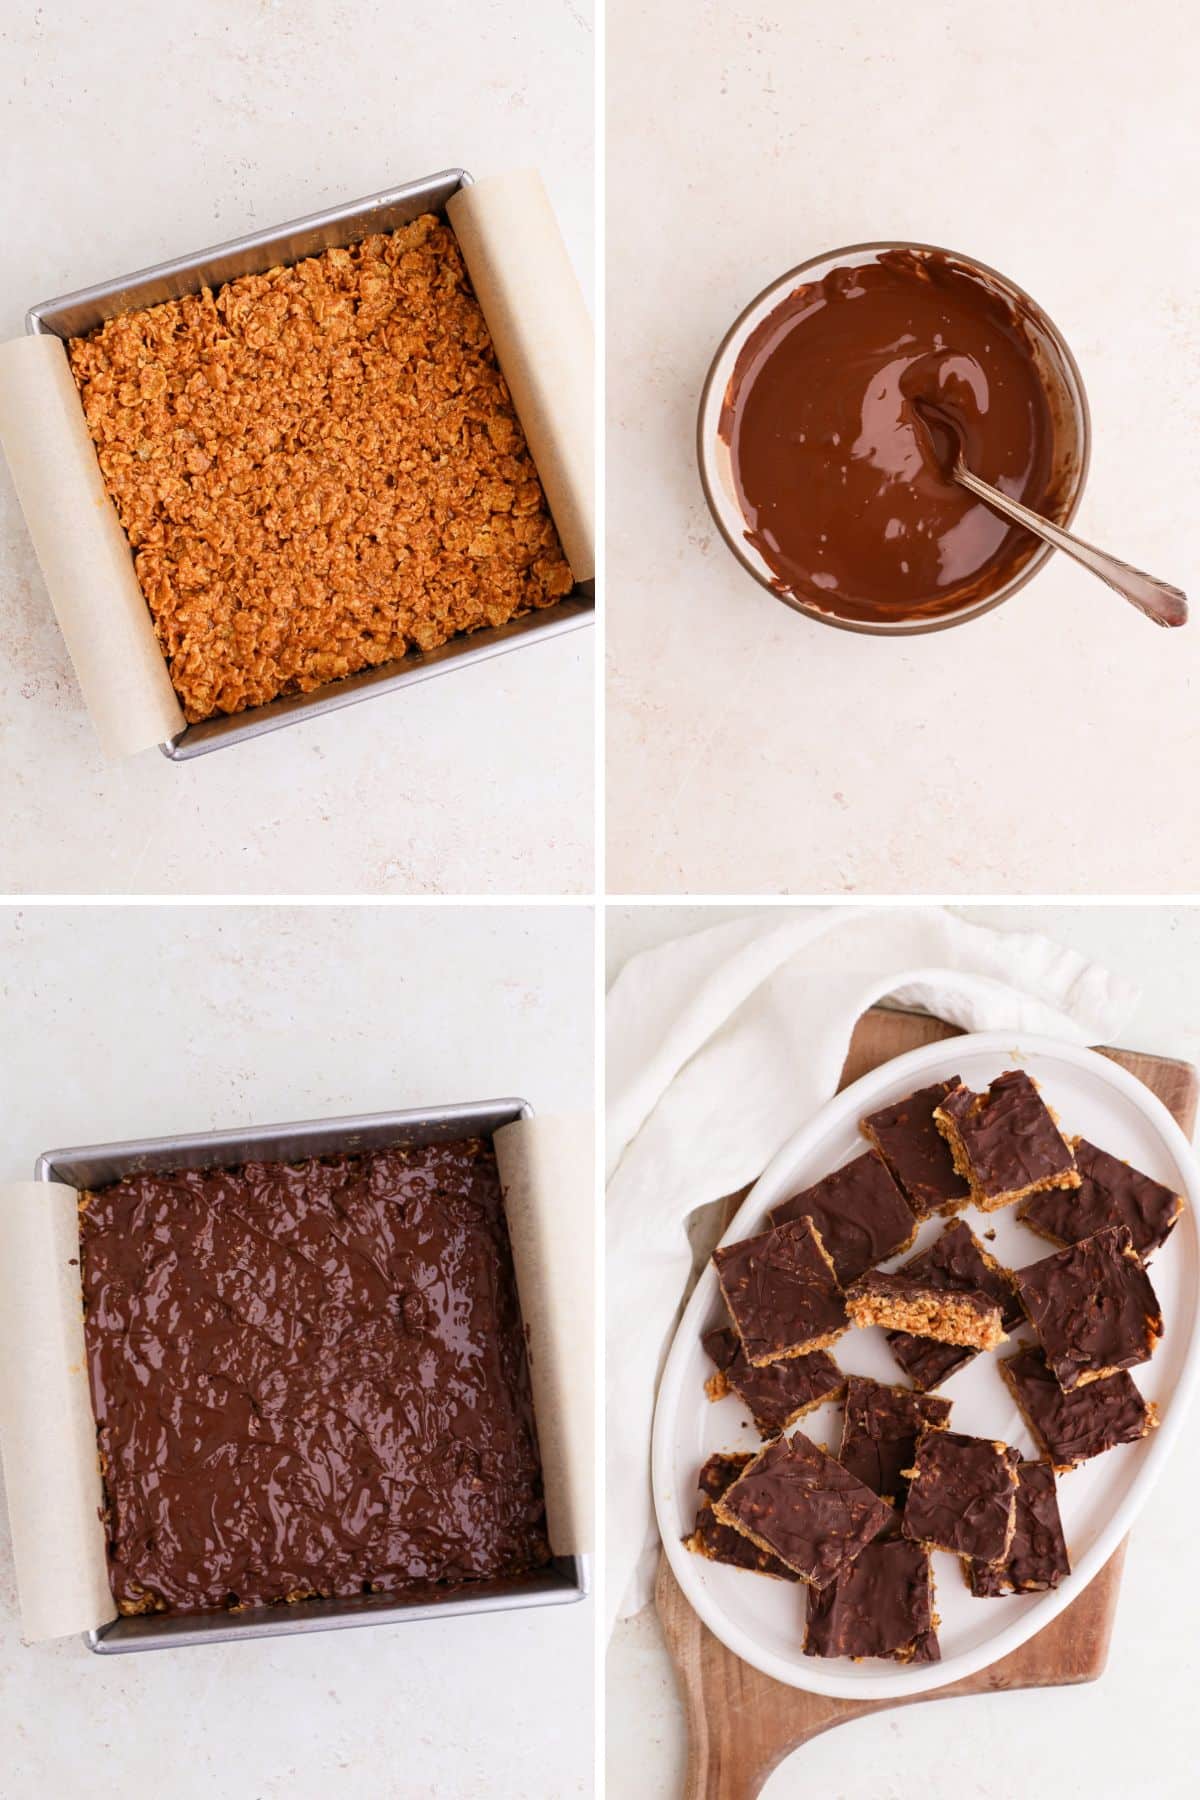
- Make base. In a large bowl, mix together peanut butter, maple syrup, and vanilla extract until smooth.
- Add cereal. Add the cereal to the peanut butter mixture and stir until even distributed and press into prepared pan.
- Melt chocolate. In a small bowl, melt the chocolate chips and coconut oil in the mircowave in 30 second increments, stirring in between until completely melted then pour over the top.
- Chill. Chill until hardened then cut into bars.
Make It Your Way: Substitutions & Variations
Please remember that recipes are just a starting point.
How can you make these butterfinger chocolate bars using what you already have? Here are some ideas…
- No peanut butter? – you could also use cashew butter or almond butter.
- No coconut oil? – either use vegan butter or unsalted butter if not dairy free.
- No maple syrup? – honey also works.
- Make it nut-free – either using tahini or sunbutter.
Helpful Tips
- Line your pan with parchment paper with some overhang for easy removal.
- Store the bars in an airtight container in the fridge or freezer, not on the counter top. They tend to be a little soft, so this helps keep their structure.
Frequently Asked Questions
Yes, the bars will just be thicker, but that’s totally fine if that’s what you have.
More No Bake Desserts
Did you try this butterfinger bars recipe? If so, please leave a comment & a star rating below. Thank you!
Homemade Butterfinger Bars
Ingredients
- ¾ cup creamy peanut butter
- ⅓ cup maple syrup
- 1 teaspoon vanilla extract
- 3 cups corn flakes cereal
Chocolate Layer
- ¾ cup chocolate chips
- 1 teaspoon refined coconut oil
Instructions
- Prepare pan. Line an 8×8 pan with parchment paper.
- Make base. In a large bowl, mix together peanut butter, maple syrup, and vanilla extract until smooth.
- Add cereal. Add the cereal to the peanut butter mixture and stir until even distributed.
- Press into pan. Press the cereal base into your prepared pan in an even layer.
- Melt chocolate. In a small bowl, melt the chocolate chips and coconut oil in the mircowave in 30 second increments, stirring in between until completely melted.
- Add melted chocolate. Pour the melted chocolate onto the bars and spread it evenly over the top.
- Chill. Chill the butterfinger bars for 1 hour in the freezer until firm, then cut into squares or bars and enjoy!
These homemade butterfinger bars are addicting in the best way. They never last more than a day or two in our house. I hope you love them as much as we do!
Ok, I made them with cashew butter and they were great, so I immediately made them again with peanut butter and wow. Soooo good, so so easy! Almond butter next.
Yayyy! Love the variations. Thanks for giving them a whirl, glad you loved them. 🙂
So good!